An updated version of this post has moved here
Along with a tripod, the Polarizer Filter is an essential piece of landscape photography equipment. It’s not merely an accessory, because you can’t produce the best possible results without one. Not every shot requires a Polarizer, but the shots that do won’t look as good without one.
What does the Polarizer do in a photo?
The Polarizer filter removes reflection/glare from reflective objects. This doesn’t sound like a big deal, but reflection can conceal the detail of an object beneath its own glare. For example, you can’t see into a car windshield when the sun is shining on it, but the polarizer removes that glare and acts like x-ray goggles so that you can see right in. Fishermen need no explanation. If using a circular polarizer, you can control its effect. As you rotate the polarizer filter, the polarizing effect rotates around the frame, and you can choose where it’s intense.
The polarizer filter generally has 3 applications in landscape photography:
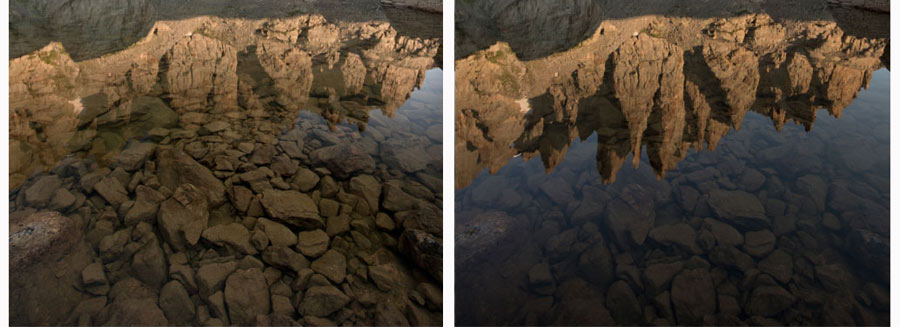
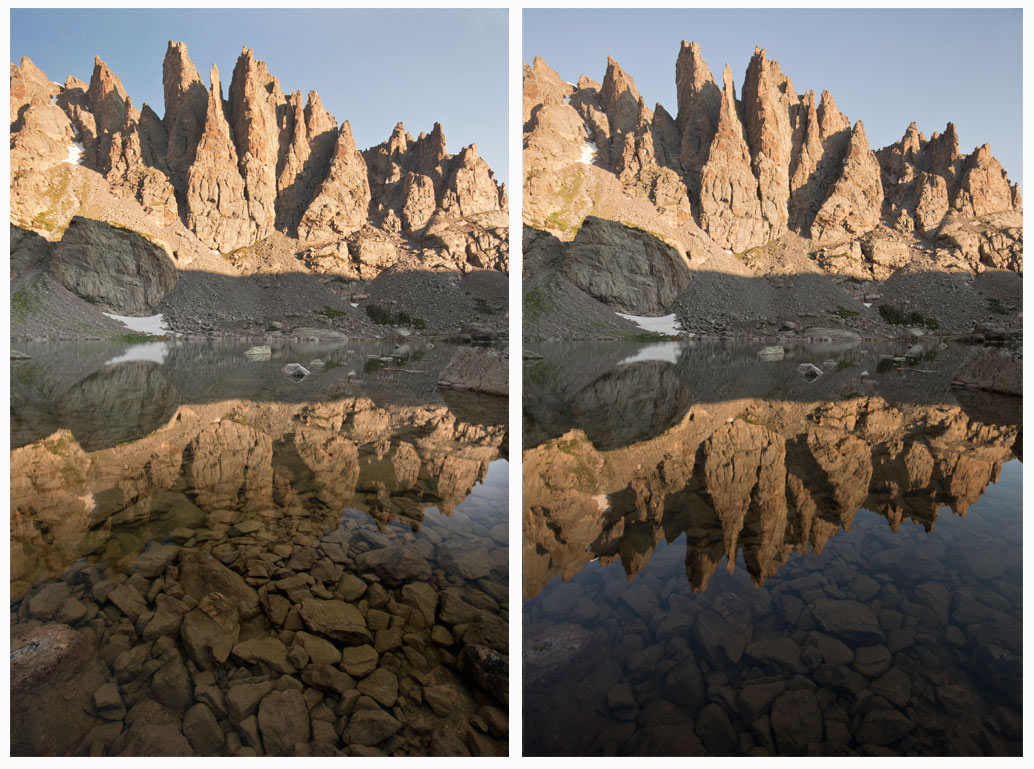
The Polarizing Filter Removes the reflection from water
The water’s surface often hides beautiful submerged stones and logs that can only be revealed with the Polarizer Filter. When you rotate the PF it makes the reflection disappear to reveal the bottom of the lake. The PF is less effective during overcast skies with diffused light, than direct reflections from sunlight.

The Polarizer Filter removes reflection from water so you can see the pond’s bottom. Using a PF in this shot is personal preference depending on whether you prefer the reflection, or the submerged stones.
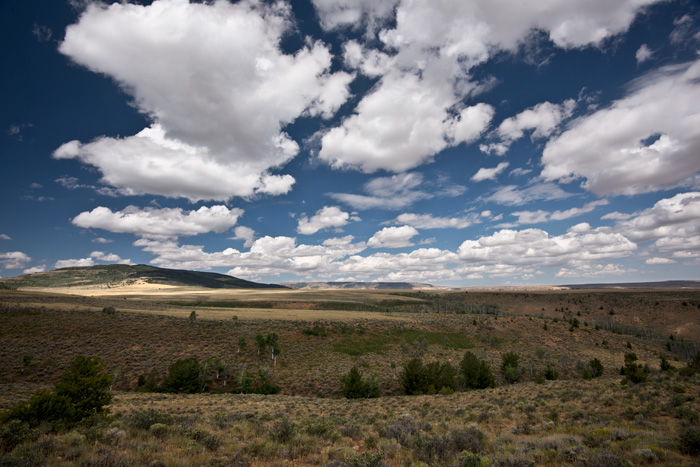
The Polarizer Filter makes the sky bluer and clouds pop
The PF makes the sky darker blue, which contrasts with the clouds. The polarizer filter has its strongest effect 90 degrees from the sun, in either direction. However, it has minimal to no effect 180 degrees from the sun. In other words, if you’re shooting the sunset on some mountains and the sun is directly behind you, due west, you won’t notice much or any effect on the sky. In this situation it’s best to shoot without a PF, unless you’re only using it to remove glare on a reflective surface.

Polarizers make the sky very blue and emphasize the details in clouds, particularly at 90 degrees from the sun.
The Polarizer Filter makes colors more saturated
Many things in nature have a smooth, shiny surface whose glare conceals the true color beneath. Picture the shiny surface of a leaf, ice, or smooth rocks. If you remove that shine with a PF, the saturated color beneath is revealed. For example, when shooting an autumn forest using a PF, the cumulative glare from the millions of leaves is removed, and the fall colors become more saturated.

A polarizing Filter made the yellow in the leaves more saturated, as well as the blue in the sky, and lavender clouds.
Disadvantages of using a Polarizing Filter
The PF is dark, like putting sunglasses over your lens. A standard PF subtracts 2 Stops of light. Therefore you must compensate by shooting at a higher ISO, wider aperture, or slower shutter speed.
Also, because a circular PF places an extra 2 pieces of glass between the image and your sensor, there’s potential for resolution loss. However, the benefits of using a PF usually far outweigh any potential for minute resolution loss.

On wide angle lenses the polarizer can cause light spots in the sky in the direction of the sun. No big deal.You can also see slight vignetting from the polarizer frame thickness.
A final consideration is vignetting. Sometimes the frame of a screw-on circular Polarizer is thick enough to show up in the corners of photos taken with wide-angle lenses. The fix? Spend a few extra bucks on a “slim” model and this won’t be a problem. You can also correct vignetting in post processing.
These are reasons to only use your PF if the scene calls for it, and not leave it on your lens for general shooting.
A decent circular Polarizer filter for a 77mm diameter lens (the typical filter size for professional lenses) will cost at least $100 USD.
Circular or Linear Polarizer
The Circular Polarizing filter screws on to your lens and is generally the preferred type because it’s compact and extremely fast to use. They can be expensive. They’re also lens-specific, so if you own lenses with different filter diameters, you you’ll need a different PF for each lens. This isn’t a problem if you shoot with a full-frame camera and professional lenses as virtually all landscape lenses use a 77mm filter.
A Linear Polarizer on the other hand, is a square filter that slides into a frame placed in front of the lens. Being nothing more than a single pane of glass that slides into a simple plastic holder, they’re cheap, and the same filter can be used with all of your lenses. On some ultra-wide lenses such as 14mm, the domed glass of the lens protrudes so far that you can only use a linear polarizer. However, the linear PF is bulky, fragile and in the way; you can’t attach it to your lens and hike up a mountain.


