
Though easy to use, exposure bracketing is one of the most powerful features on your camera apart from the main exposure settings. In its simplest form, exposure bracketing is when the camera takes three shots when you press the shutter button, each at different exposure settings: one underexposed for the highlights, one correctly exposed for the mid-tones, and one overexposed for the shadows (-…0…+).
The power of bracketing lies in merging these photos into a composite image with perfect exposure throughout, avoiding clipped shadows and highlights. To create the composite, you can manually blend the images in Photoshop using masks or easily merge them into a high-dynamic range (HDR) image in Lightroom. When you merge photos from a high-contrast scene, the resulting image has a better dynamic range than a single processed photo.
A single RAW file can capture up to 15 stops of dynamic range. This might suggest that you can recover blown highlights and clipped shadows almost infinitely. In reality, a RAW file only contains enough dynamic range for thorough processing if the scene has uniform exposure. For example, a landscape beneath a cloudy sky has neutral exposure throughout: there are no harsh shadows because the light is diffused and no bright highlights because the sun is blocked.
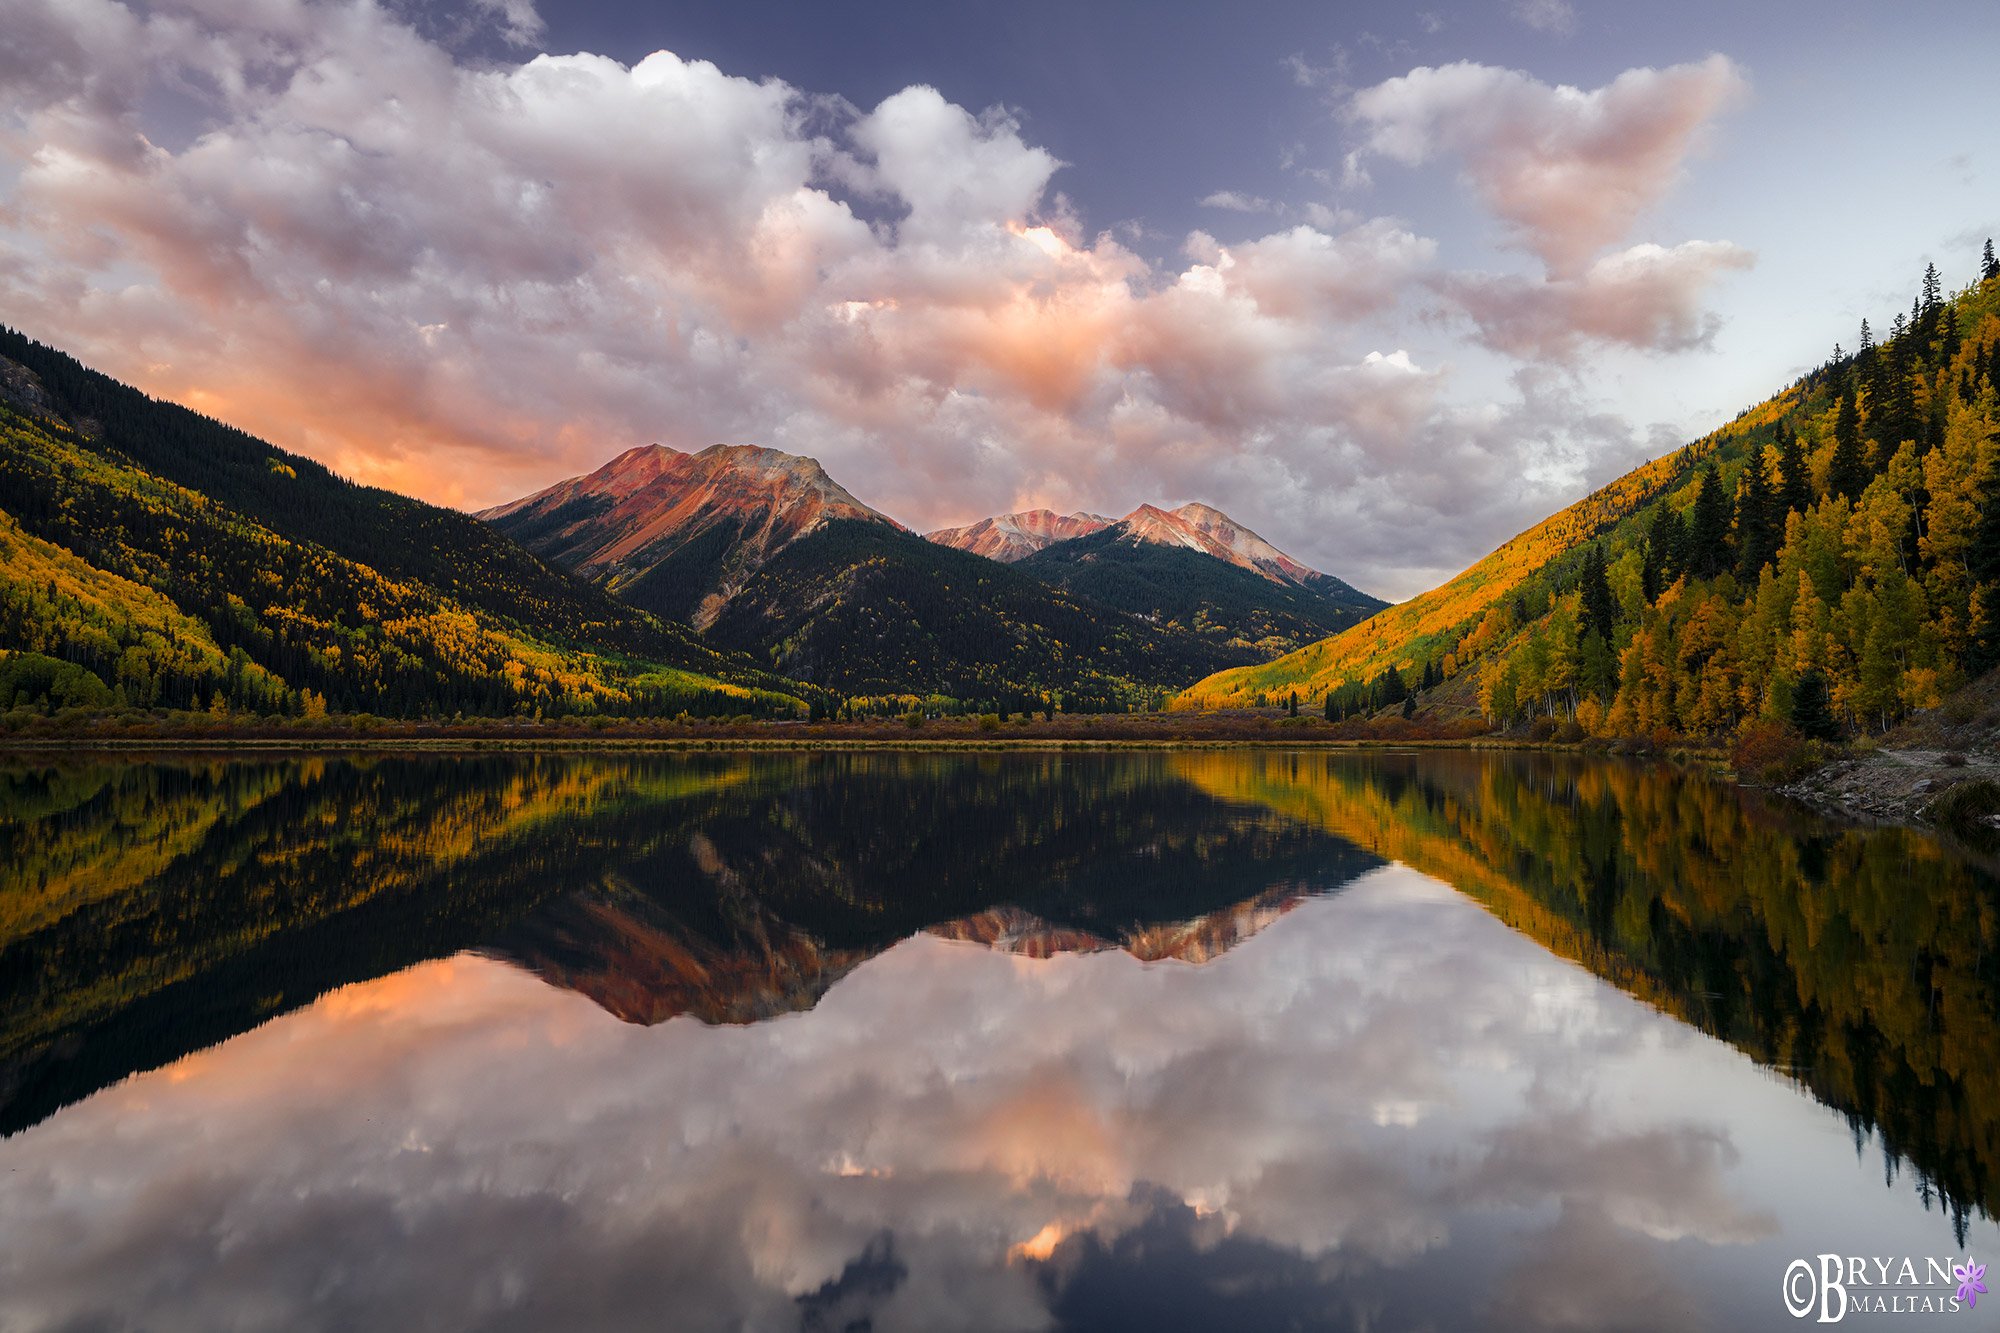
In high-contrast scenes with dark shadows and bright highlights, the dynamic range of most cameras struggles to capture both at once. Take, for example, a landscape filled with mountains during the light of sunset. The foreground and most of the mountains fall into dark shadow, but the peaks and clouds remain very bright because the low-angle sun still shines on them.
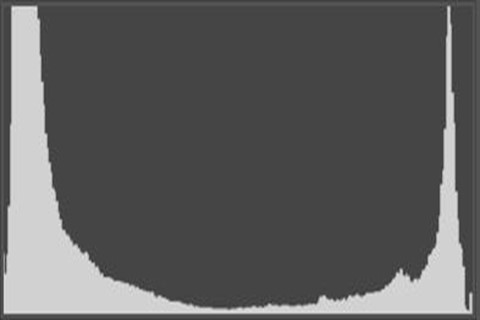
The histogram of very high-contrast scenes contains peaks against both sides with few pixels in the mid-tones. This shape indicates that the scene has a greater exposure range than the camera’s dynamic range can record. The only way to capture the scene without clipping is to use exposure bracketing to create an exposure composite.
In high-contrast scenes, a single shot is only capable of capturing correct exposure in one area of the photo, leaving the other parts clipped. You can underexpoe the sky to preserve the details in the clouds, but this will leave the foreground as a black silhouette. You can overexpose for the foreground, but this will blow the sky out, leaving it white with no details. If you compromised with a neutral exposure, it would only capture some detail in the sky and foreground, resulting in a drab overall photo.
With bracketing, you don’t have to compromise. By taking separate exposures for bright and dark areas and then merging them into a composite, you can achieve an image with detail throughout. Exposure bracketing is a staple of my photography; I bracket and blend nearly every landscape shot that includes both sky and foreground.
You can easily recognize a high-contrast scene by looking at it, but the camera’s histogram can tell you empirically. The histogram of a high-contrast scene has distinct peaks at both the left (representing dark areas) and the right (representing bright areas) ends of the graph, with a dip in the middle (representing mid-tones). Contrast is particularly high if either of the peaks touches the sides of the graph.
Bracketing has many possible variations beyond my example of -,0, +. To set up bracketing, specify the number of shots per bracket and the exposure value (EV) between shots. Typically, you can choose anywhere between 2 and 9 shots and 1 to 3 EVs. On most cameras, the EV settings are limited based on the number of shots:
2 shots x 3 EV (-3…0)
3 shots x 3 EV (-3…0…+3)
3 shots x 1 EV (-1…0…+1)
5 shots x 3 EV (-6…-3…0…+3…+6)
7 shots x 2 EV (-6…-4…-2…0…+2…+4…+6)
9 shots x 1 EV (-4…-3…-2…-1…0…+1…+2…+3…+4)
Shop Camera Accessories on Amazon Prime:
Includes affiliate links
Choosing the number of shots and the EV interval depends on the exposure differential between the brightest and darkest parts of the scene. If the shadows are extremely dark with very little ambient light, and direct sunlight is illuminating the highlights, you might need five shots at 3 EV to capture the maximum spread of 15 stops. In scenes with a subtle gradation of luminosity between bright and dark areas, skipping an EV could miss details in some shades, so you might need to bracket with 9 shots at 1 EV interval. However, these are extreme examples; typical scenes only need 3 bracketed shots.
When taking bracketed shots, most cameras offer the option of continuous bracketing, where the camera captures all the frames in a continuous burst when you press the button. This method is faster and helps the images blend together seamlessly. You can also choose whether a timer triggers the bracketing sequence or if you need to press the button manually. When using a tripod, set the timer for 2 seconds to reduce vibrations between shots. When hand-holding, fire the bracket manually so you don’t have to stand there and wait for the timer.
Combining bracketing with exposure compensation allows distributing more shots on either the positive or negative side of exposure when one part of the scene has disproportionate exposure. For example, setting exposure compensation for -2 stops with a bracketing sequence of 7 shots at 2 EV intervals would shift the sequence to the negative side (-8, -6, -4, -2, 0, +2, and +4).
 Aside from blends and HDR images, bracketing is a handy scattergun approach for picking the best exposure when extreme lighting skews the light meter’s reading and you don’t have time to determine perfect exposure. Photographing a total solar eclipse is a great example. During the brief minutes of totality, several of the sun’s features become visible, each requiring vastly different exposure settings. If you don’t already know the best exposure settings for each, there’s little time to figure them out. Bracketing by the maximum amount gives you the best chance of capturing this ephemeral event.
 About Bryan Maltais- Fort Collins, CO
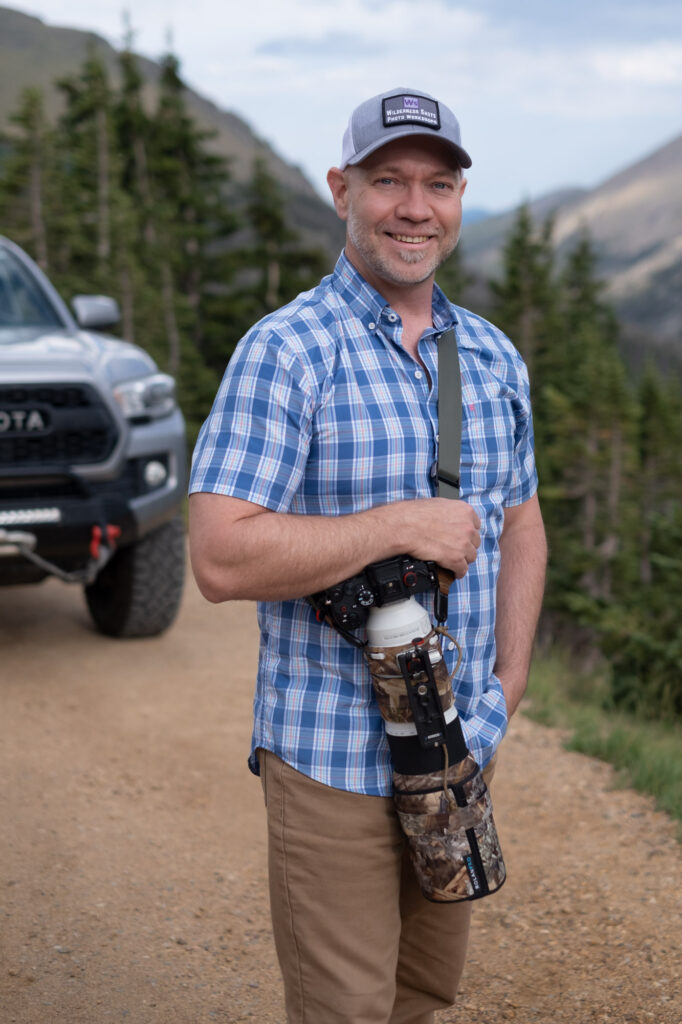 About Bryan Maltais- Fort Collins, CO
Bryan Maltais is an award-winning professional photographer, film-maker and founder of Wilderness Shots Photography Workshops. His images are displayed in spaces around the world and have been published in well known photography magazines and media channels. He’s also the author of “Infinite Horizons-The Complete Nature & Landscape Photography Guide“.
“I was addicted to exploring nature and observing animals very young, keeping terrariums full of insects and amphibians. Craving a camera to capture the beauty that I witnessed in nature, my dad gave me a manual Canon that he had lying around from 1970. A military brat, I grew up in Germany, New Jersey and Missouri. I received my BS in Wildlife Biology at the University of Missouri-Columbia. This gave me a good foundation for understanding the natural world. I also did a stint in the Army, which gave me a good foundation for tolerating insects and lack of sleep. My dream was to live in the Rocky Mountains, so after college I moved to Ft. Collins, Colorado where I still live today. Since then I’ve been shooting and documenting the American West and producing wildlife nature documentaries. My latest film is on Amazon Prime. My goal with nature photography workshops is to share knowledge, fun and adventure with others while enjoying nature. I currently shoot Sony and Olympus gear. When not photographing, I garden in my raised beds and teach 3-4 year olds in Sunday School.”

When you’re bracketing what mode do you use, AV or TV?
When bracketing for shooting landscapes I’m in Aperture Priority