
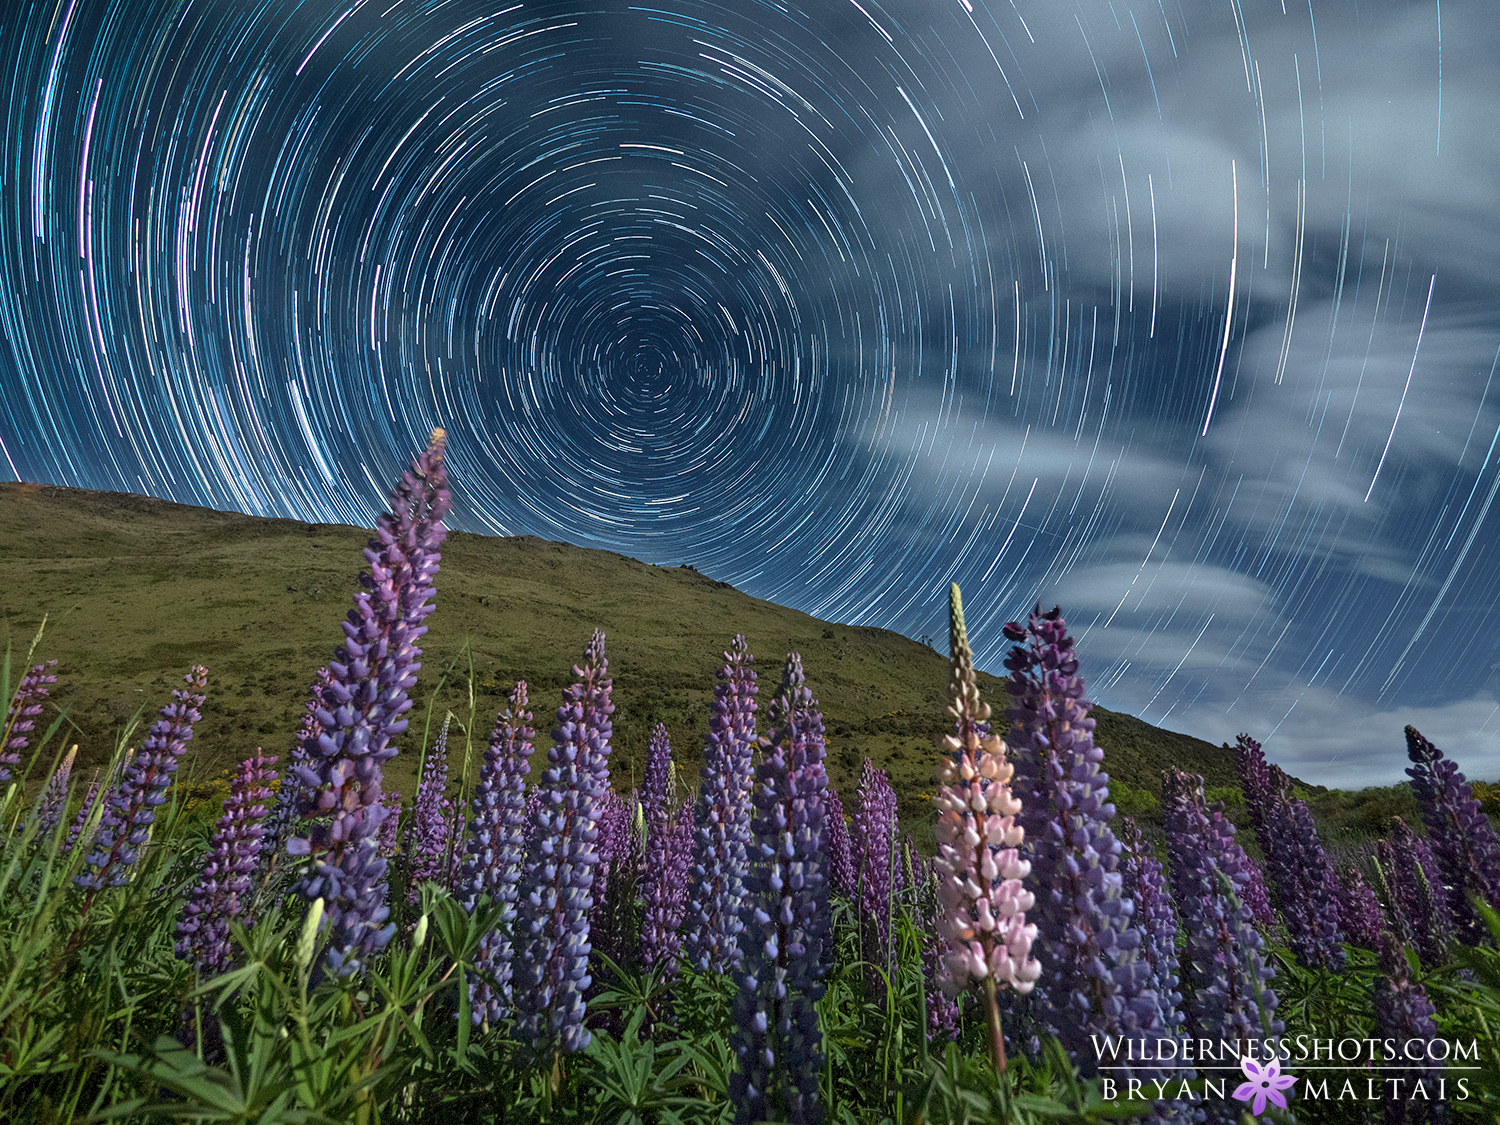
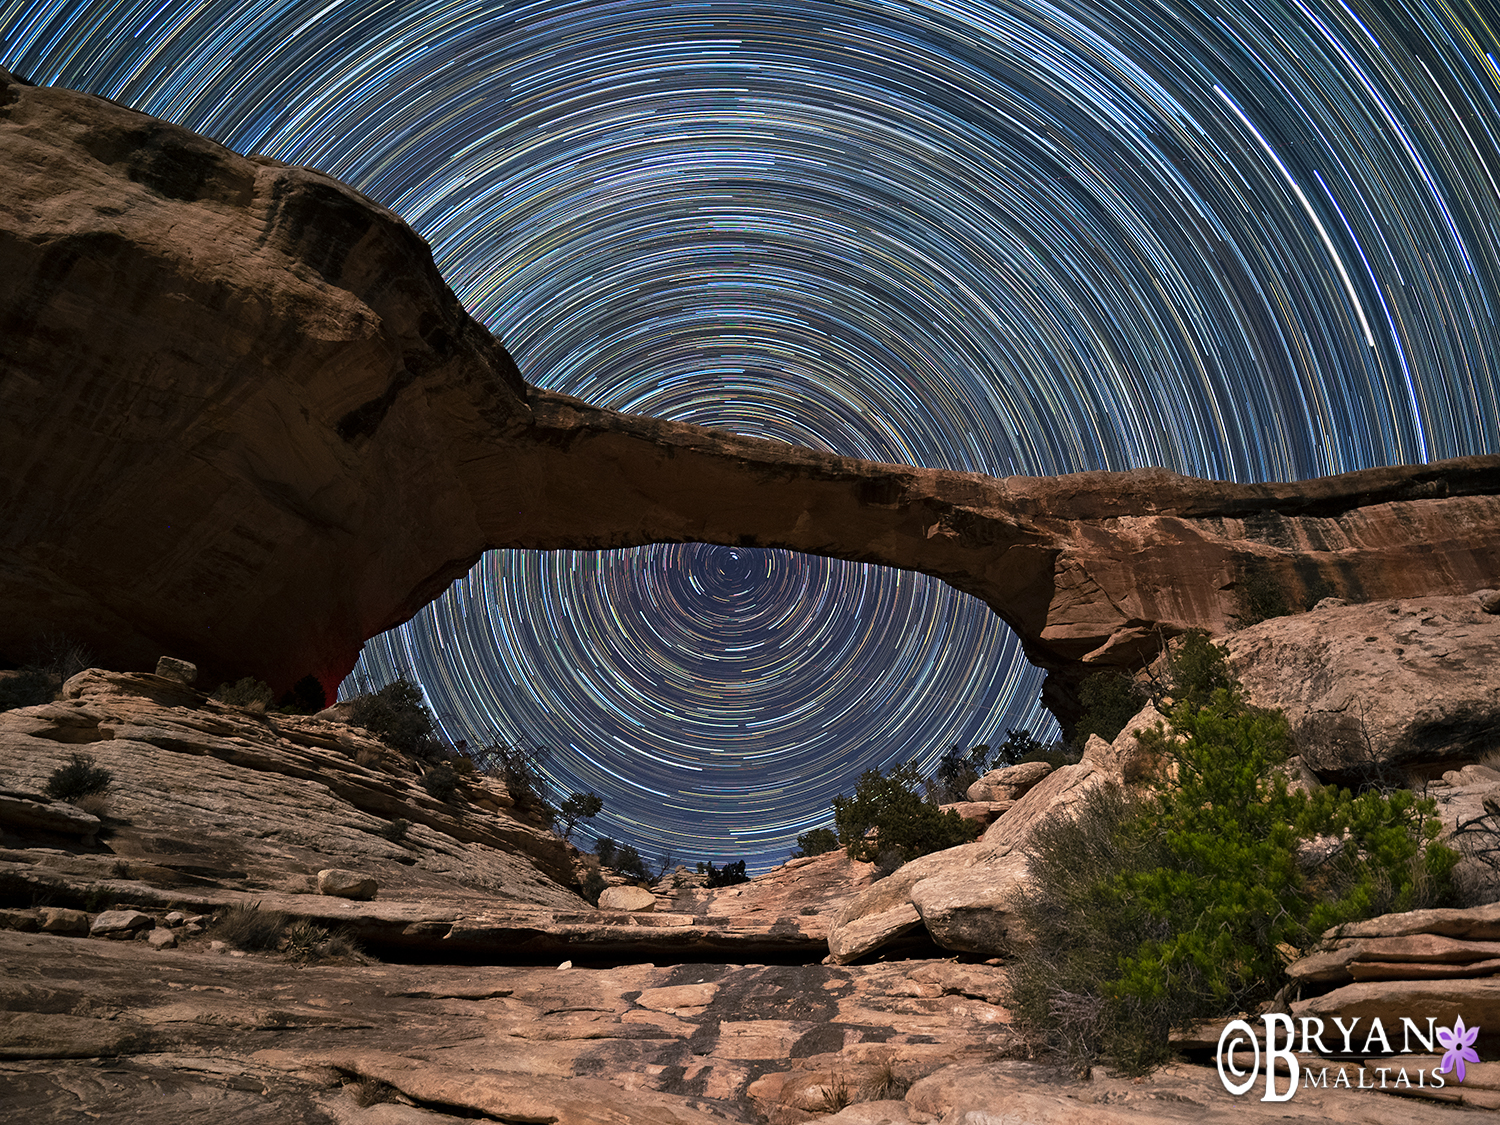
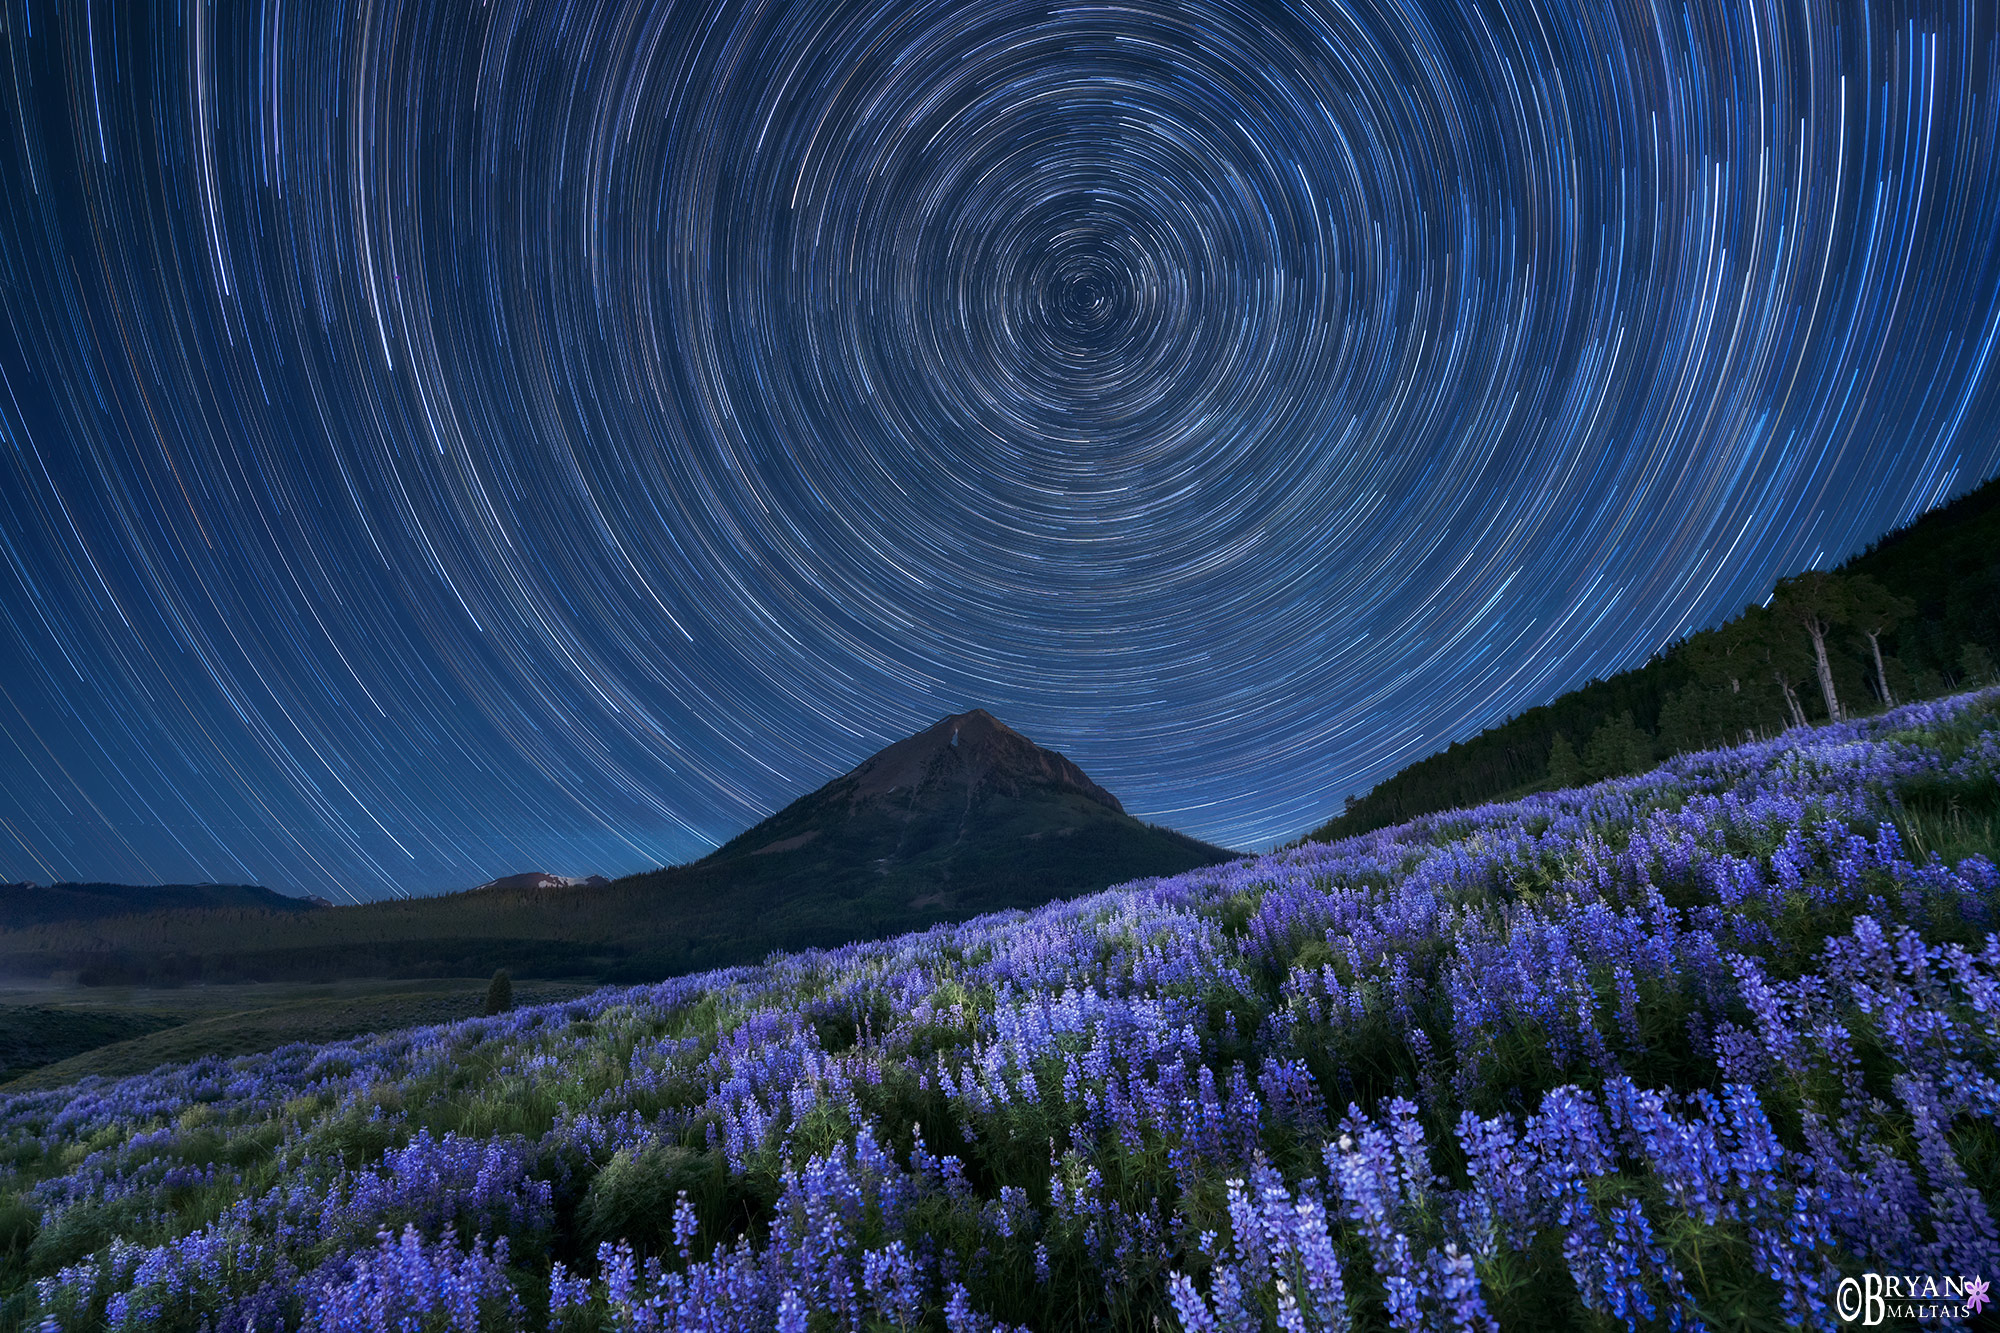
Images of swirling concentric light rings etched into photos by stars are one of the most spectacular depictions of light in nature photography. Stars create natural streaks of light in long exposures as the Earth spins. Such images are made by shooting continuous exposures using an intervalometer and then light stacking them into a composite image. Light stacking keeps the brightest pixels from each frame and blends them into the composite, resulting in star trails.
Shop camera accessories on Prime (affiliate links):

How to Frame the Circumpolar Point
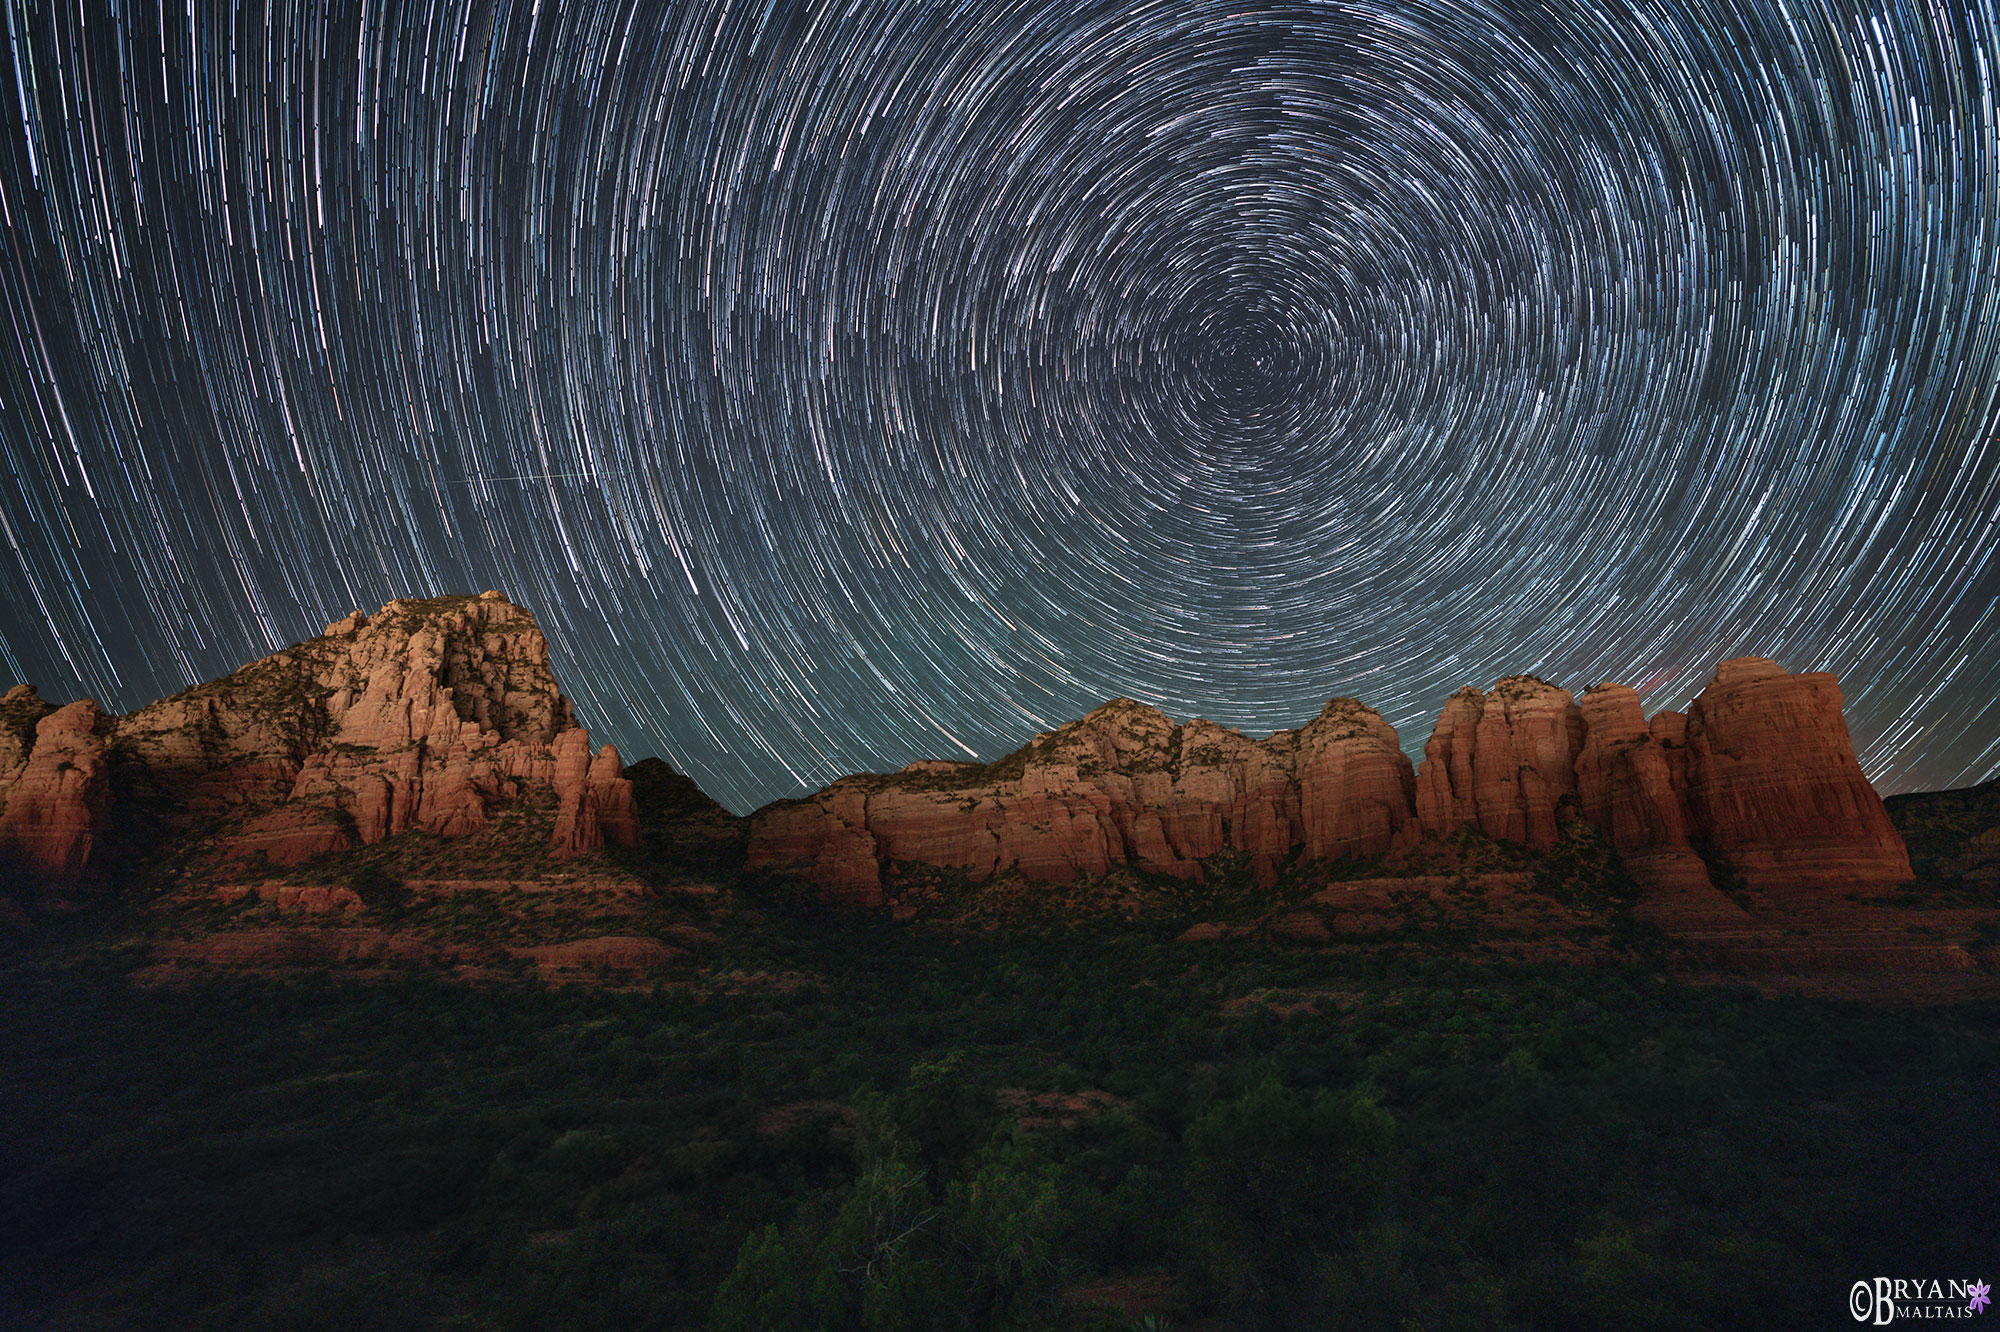
The classic circular patterns of concentric rings that resemble grooves in a record are called circumpolar star trails. They’re captured by aiming the camera north at Polaris or due south in the southern hemisphere. You can capture trails in any other direction, but they form star paths, not circles.
Polaris (the North Star) forms the rotational axis of star trails in the northern hemisphere. In the southern hemisphere, the Southern Cross and the Poniters orient towards the circumpolar point. Centering the circumpolar point in the upper 2/3 of the frame with the landscape in the lower 1/3 captures a wide view of the star trails.
To locate Polaris without an app, find the Big Dipper in the northern sky and look at the two stars that form the end of its ladle. Imagine a line from the bottom to the top star, extending about the same length as the Dipper’s handle. This should point approximately to Polaris, the brightest star in the Little Dipper. Despite its biblical history, Polaris is not so bright that it’s evident in the northern sky.
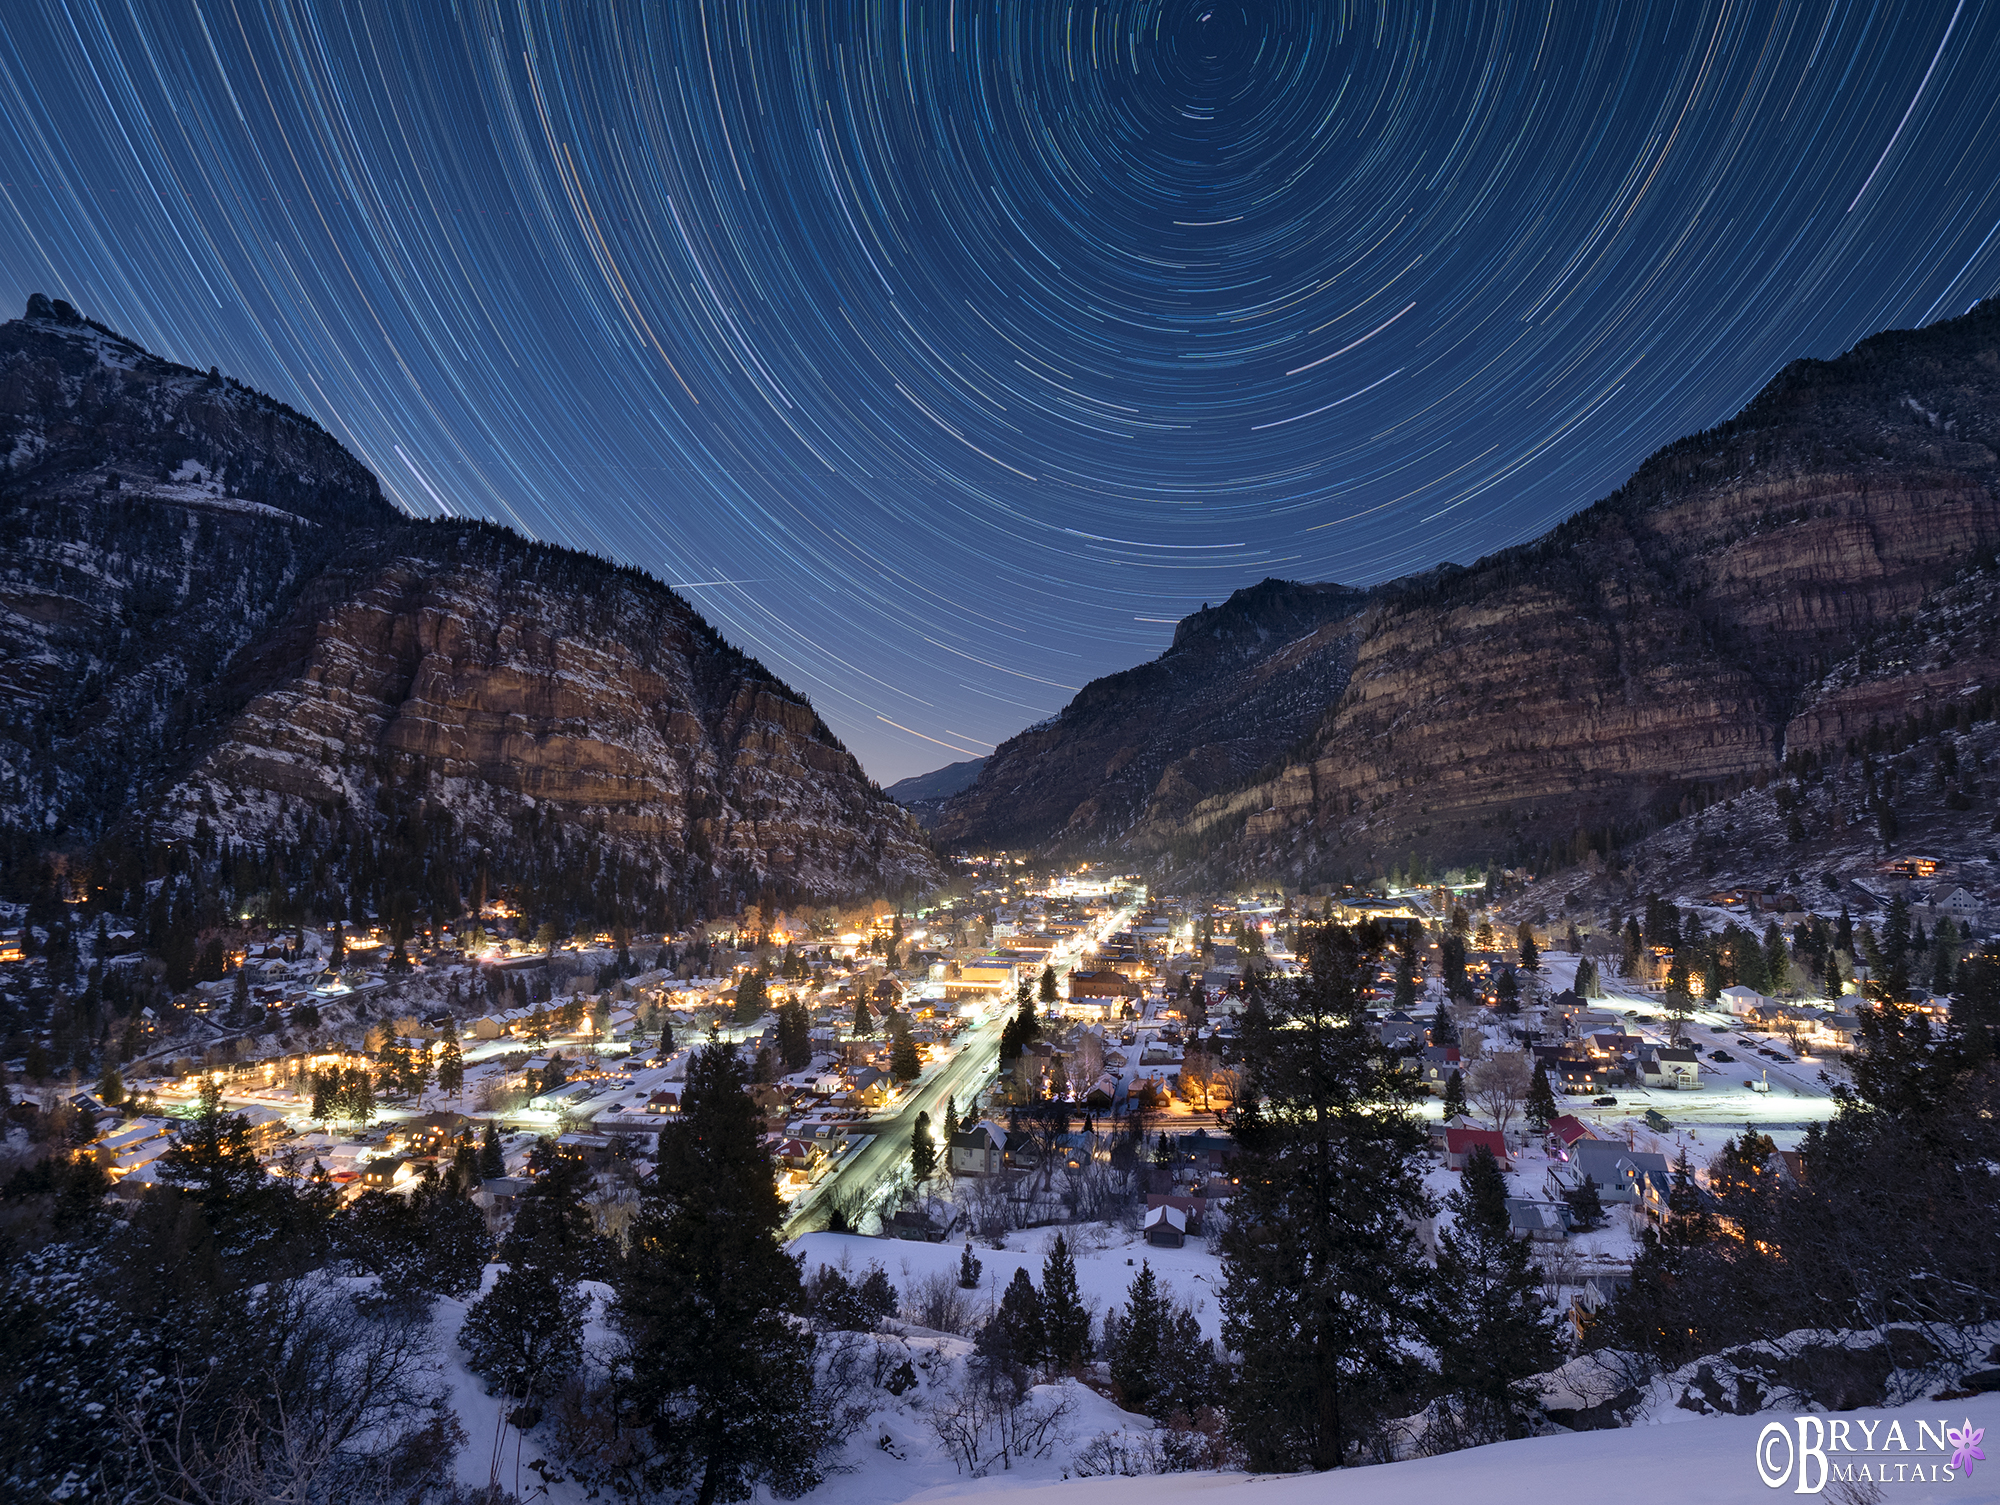
There’s a rough method for framing Polaris if you can’t see it, for example, when photographing the landscape during blue hour. Center the frame on true magnetic north using your compass, then aim up to include mostly sky. Polaris is at an altitude of about 40° at the midlatitude. That’s so high that landscape elements must be pretty close or tall to capture them with prominence in the photo. The farther north you are, the further overhead Polaris is. The further towards the equator, the closer to the horizon it is, which makes framing a landscape with star trails much easier.
To position Polaris precisely, you need to adjust for declination, which is the difference in degrees between true and magnetic north. Declination is printed on local topo maps. You can also search for it online for your location.
In the southern hemisphere, the Southern Cross (Crux) and the Pointer Stars are reference points for the southern circumpolar point. They’re both prominent and easy to find when looking south. Draw an imaginary line heading through the longest part of the cross. Draw another heading between the two pointer stars. The circumpolar point is where both lines intersect.
 Star Trail Settings
 Star Trail Settings
The best method for capturing star trails is to use continuous shooting with an intervalometer. The longer you shoot, the longer the star trails will be. If using an ultra-wide lens, you’ll start to see a pattern of movement after about 10 minutes. Prominent trails form in around 30 minutes, and long concentric circles will take 90 minutes to a few hours.
Because lens focal length can either magnify or minimize size and motion, the wider the lens, the longer it takes star trails to form. The following formula calculates the resulting length of star trails in the composite image. You don’t need this formula to shoot star trails, but the variables help demonstrate how star trail photos work.
(Focal Length x Exposure Time x 1.47)/1000 = Length of Star Trails
In this formula:
- Focal Length is full-frame
- Exposure Time is the cumulative exposure in seconds, not the shutter speed
- 1.47 is a constant that represents the Earth’s rotation rate and the angular movement of the stars
- Length of star trails is the linear length in mm across the image viewed at full resolution
- 1000 converts to mm
Aperture and ISO Control Star Trail Brightness
 Aperture and ISO Control Star Trail Brightness
When choosing the settings, star brightness is controlled with aperture and ISO. Increasing ISO or using a larger aperture captures more stars with thicker trails. If overused, it can produce trails that are so densely spaced that the sky becomes mostly white. Reducing ISO or aperture captures thin, subtle trails. Compared to shooting the Milky Way, you can use a much lower ISO for capturing star trails like ISO 800 or 1000. This lets you use a smaller aperture like f/4 instead of the lens’ max aperture, which renders better image quality.
Shutter Speed Trade-offs
 Shutter Speed Trade-offs
When deciding on shutter speed, there’s a trade-off to consider. A shorter shutter speed results in more frames to edit, stack, and store. For example, if you’re capturing 1-hour star trails, using a 30-second shutter speed will give you 120 frames (technically 116 due to the interval delay), while a 90-second shutter speed will yield only 40 frames, making processing simpler. The ideal shutter speeds to use are between 30 and 120 seconds. I usually opt for a 90-seconds. Shutter speed doesn’t affect star exposure after they start trailing, which means star brightness appears the same whether using a 30-second or 120-second exposure.
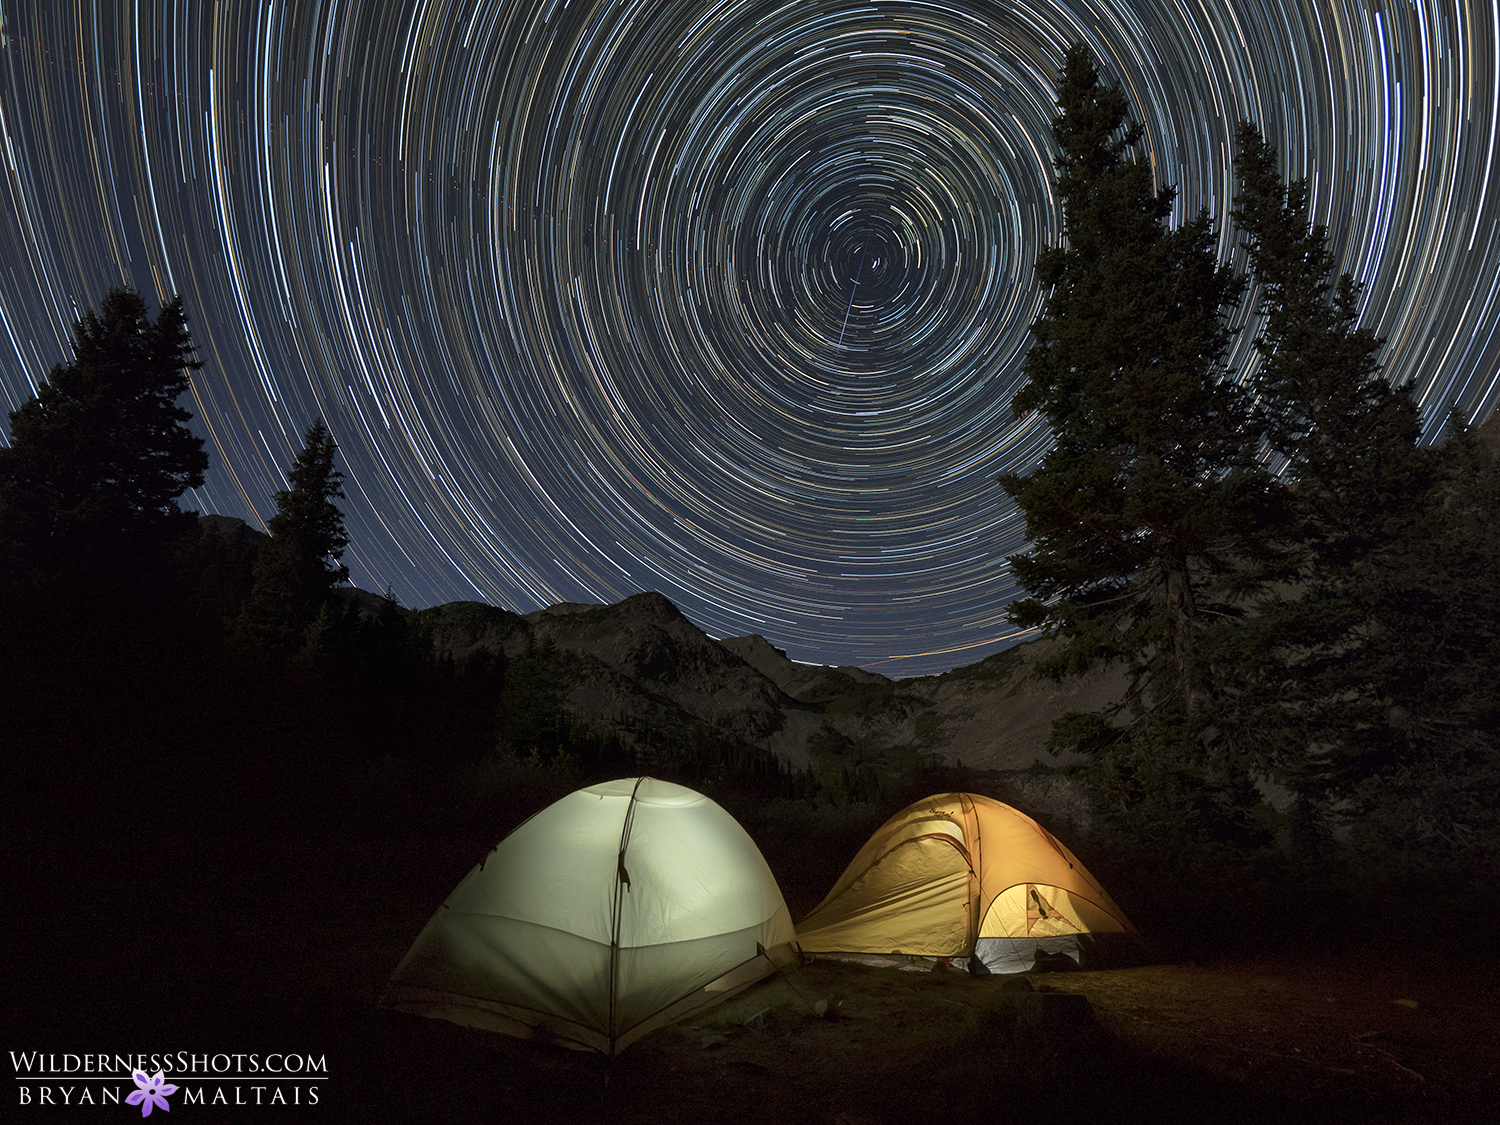
The shutter speed affects exposure in the landscape. If you’re shooting beneath only starlight, then a longer shutter speed is better for exposing the landscape. If there’s a bright moon or ambient lights, exposure will be blown out during a long exposure. If you want to use a long shutter speed to reduce frame count, but it’s too bright, shoot a separate exposure for the landscape and blend it.
Why wouldn’t you use very long shutter speeds, like 5 minutes, if they simplify star trails? This would cause the landscape to be overexposed if there’s a bright moon or ambient lights. Additionally, the sensor heats up during long exposures, causing high image noise. Long exposures also leave wider gaps in the trails when a frame is omitted, making it harder for the stacking software to bridge. Frames are often omitted when clouds or aircraft trails ruin one.
Using an Intervalometer for Star Trails
 Using an Intervalometer for Star Trails
You can either use the camera’s intervalometer or a remote intervalometer. Most cameras limit the shutter speed to a maximum of 30-sec when using the internal intervalometer. You need a remote intervalometer to use longer shutter speeds. When using a remote intervalometer to render long exposures, the camera shutter speed needs to be set to Bulb (B).
To set up interval shooting using a remote intervalometer, enter the shutter speed, number of shots, and the interval. The shooting duration determines the number of shots. For example, if you want to shoot star trails for 2 hours (7200 seconds) using a 90-sec shutter speed, 80 shots would be required. The interval needs to be 1 second longer than the exposure. So if you’re using a 90-second exposure, the interval would be 91 seconds. Without this 1-second buffer, continuous shooting will malfunction.
Step by Step Instructions for Shooting Star Trails with a remote Intervalometer
- Mount camera to tripod
- Remove Filters
- Turn off image stabilization on the camera and lens
- Set format to RAW
- Deactivate Long Exposure Noise Reduction if necessary (only applies if shooting JPEG)
- Set Frame-rate to single
- Set shooting mode to Manual
- Manual Focus
- Set white balance to 3800k
- Aperture: f/4, ISO: 800, Shutter Speed: Bulb
- Decide shooting duration and calculate the number of frames: (duration in seconds/shutter speed)=frames
- Set up the Remote Intervalometer: Enter the frames, interval, and shutter speed. Set 90-sec shutter speed. Set interval 1 second longer than shutter speed.
- Focus on a Star
- Roughly frame the composition and take a test shot: Start the intervalometer then stop after 1 frame.
- Reposition and readjust the settings and take the final Image: Reposition the frame if necessary for a balanced composition of the landscape and sky. If Polaris is too high in the test shot, reposition so it’s low enough to capture enough of the star trails.
You should see slight trailing captured in the stars during the 90-sec test shot. Look at the density and brightness of the stars, and adjust their exposure with the ISO and/or aperture if necessary.
Processing Star Trails
I recommend using StarStaX to composite your star trail images automatically. It’s free and straightforward to use. You can use Photoshop, but it’s much more complicated.
To process star trails, select all of the RAW photos in Lightroom and batch edit them to your preferences. Export all of them as JPEGs to a separate folder. Import the JPEGs into StarStaX and stack them. The process only requires a few clicks and is intuitive to figure out. StarStaX averages as it stacks, which reduces noise and minor clouds. It saves each stacked image as it goes, which lets you pick the image with just the right amount of trailing, and making time-lapse videos.
There will likely be some aircraft trails through some of the frames that you need to fix before stacking. The easiest method is to exclude them from the stack and let StarStaX bridge the resulting gaps. If this doesn’t work, you can use the healing brush in Lightroom by left-click at the beginning of a trail, then shift+left click at the end. Heavy aircraft trails can ruin star trails so it’s worth checking local air traffic before committing to a night of shooting.
If you took a separate exposure for the foreground, the final step is to blend it with the star trail composite. If errant headlights or other light pollution accumulated during the light stacking process, you can blend an unpolluted individual frame with the composite.


About Bryan Maltais- Fort Collins, CO
 About Bryan Maltais- Fort Collins, CO
Bryan Maltais is an award-winning professional photographer, film-maker and founder of Wilderness Shots Photography Workshops. His images are displayed in spaces around the world and have been published in well known photography magazines and media channels. He’s also the author of “Infinite Horizons-The Complete Nature & Landscape Photography Guide“.
“I was addicted to exploring nature and observing animals very young, keeping terrariums full of insects and amphibians. Craving a camera to capture the beauty that I witnessed in nature, my dad gave me a manual Canon that he had lying around from 1970. A military brat, I grew up in Germany, New Jersey and Missouri. I received my BS in Wildlife Biology at the University of Missouri-Columbia. This gave me a good foundation for understanding the natural world. I also did a stint in the Army, which gave me a good foundation for tolerating insects and lack of sleep. My dream was to live in the Rocky Mountains, so after college I moved to Ft. Collins, Colorado where I still live today. Since then I’ve been shooting and documenting the American West and producing wildlife nature documentaries. My latest film is on Amazon Prime. My goal with nature photography workshops is to share knowledge, fun and adventure with others while enjoying nature. I currently shoot Sony and Olympus gear. When not photographing, I garden in my raised beds and teach 3-4 year olds in Sunday School.”
