
How to Cull Photos in Lightroom
Before editing your photos from a shoot, you have to cull them down to the keepers. There’s a streamlined process for doing this in Lightroom that can go quickly with a disciplined approach.
If you’ve ever returned from a trip with thousands of photos, you know how challenging culling can be. You likely took several versions of the same shot, and some that looked good in person, but didn’t translate through the lens. You probably also took some that you shouldn’t have just because you got trigger happy. You might also have bracketed, giving you 3 or more exposures of every shot. If you’re a wildlife photographer, you might have filled up several memory cards with shots of little birdies flying towards you, taken on continuous high frame-rate. In any case, every shoot produces photos that serve no purpose and should be deleted, especially because of the large file sizes of many modern cameras. Hauling around TB’s of useless images for the rest of your life is no way to live. This article will explain the steps necessary to cull photos in Adobe Lightroom.
Criteria for Culling Photos
So how do you decide which images to cull? If the image has no use, it should be trashed. What counts as a usable photo is up to you. It can simply be that you want to look at it again. Obvious candidates for deletion are out of focus shots, ones too badly exposed to recover, boring scenes, duplicates, bad light etc… I aggressively cull any image that isn’t good enough to include in my online portfolio or potentially use for stock or magazines. I’ve never regretted deleting an image, and I still feel like I have way too many on my hard drive.
I begin culling in-camera before I even return home. Downtime like on a plane or waiting behind my tripod for good light is perfect for this. I can tell through the viewfinder if a shot is unusable or trash. Some photographers consider this too risky and wait until they’re on a computer. It’s up to you, but you can at least eliminate a few of the obvious rejects in-camera. Culling begins before you even start shooting. Learning to recognize what makes a good shot, and refraining from taking ones that aren’t can save hours in the editing room.
How to Tag and Cull Photos in Lightroom
The culling process involves flagging photos, then making several rounds of cuts that distills them down to the keepers. You can flag photos with flags, colors and numbers. Only photos with a flag advance to the next round, while those not selected are excluded from being displayed. You can rate and cull photos your own way, but a three round cut like the one below is typical.
The first Cut
The first cut is to flag images worth reviewing, and rejecting obviously flawed ones. You should flag any images that you’re unsure about rejecting. You should also keep duplicates/different versions of the same shot to compare in the next cut. This is not the cut to be overly critical.
Setup for Culling Photos in Lightroom
With your photos imported into your Lightroom catalog, make sure you’re in the Library panel (found in the upper right view toolbar). Also select Loupe view, found in the main toolbar under View. Pressing Tab hides the sidebars on either side of the photo for a distraction-free view. Of the three rating options (colors, numbers, flag), I recommended using the flag for the first cut. Hit “P” to flag an image and “X” to reject it. The rejected photos become grayed-out. By hitting X, you’re not deleting them, just disqualifying them. Turning caps lock on will automatically advance to the next image after flagging so you don’t have to press the arrow key each time. To undo a rating, hit “U”. When you’re done culling, turn filters on and show only flagged images.
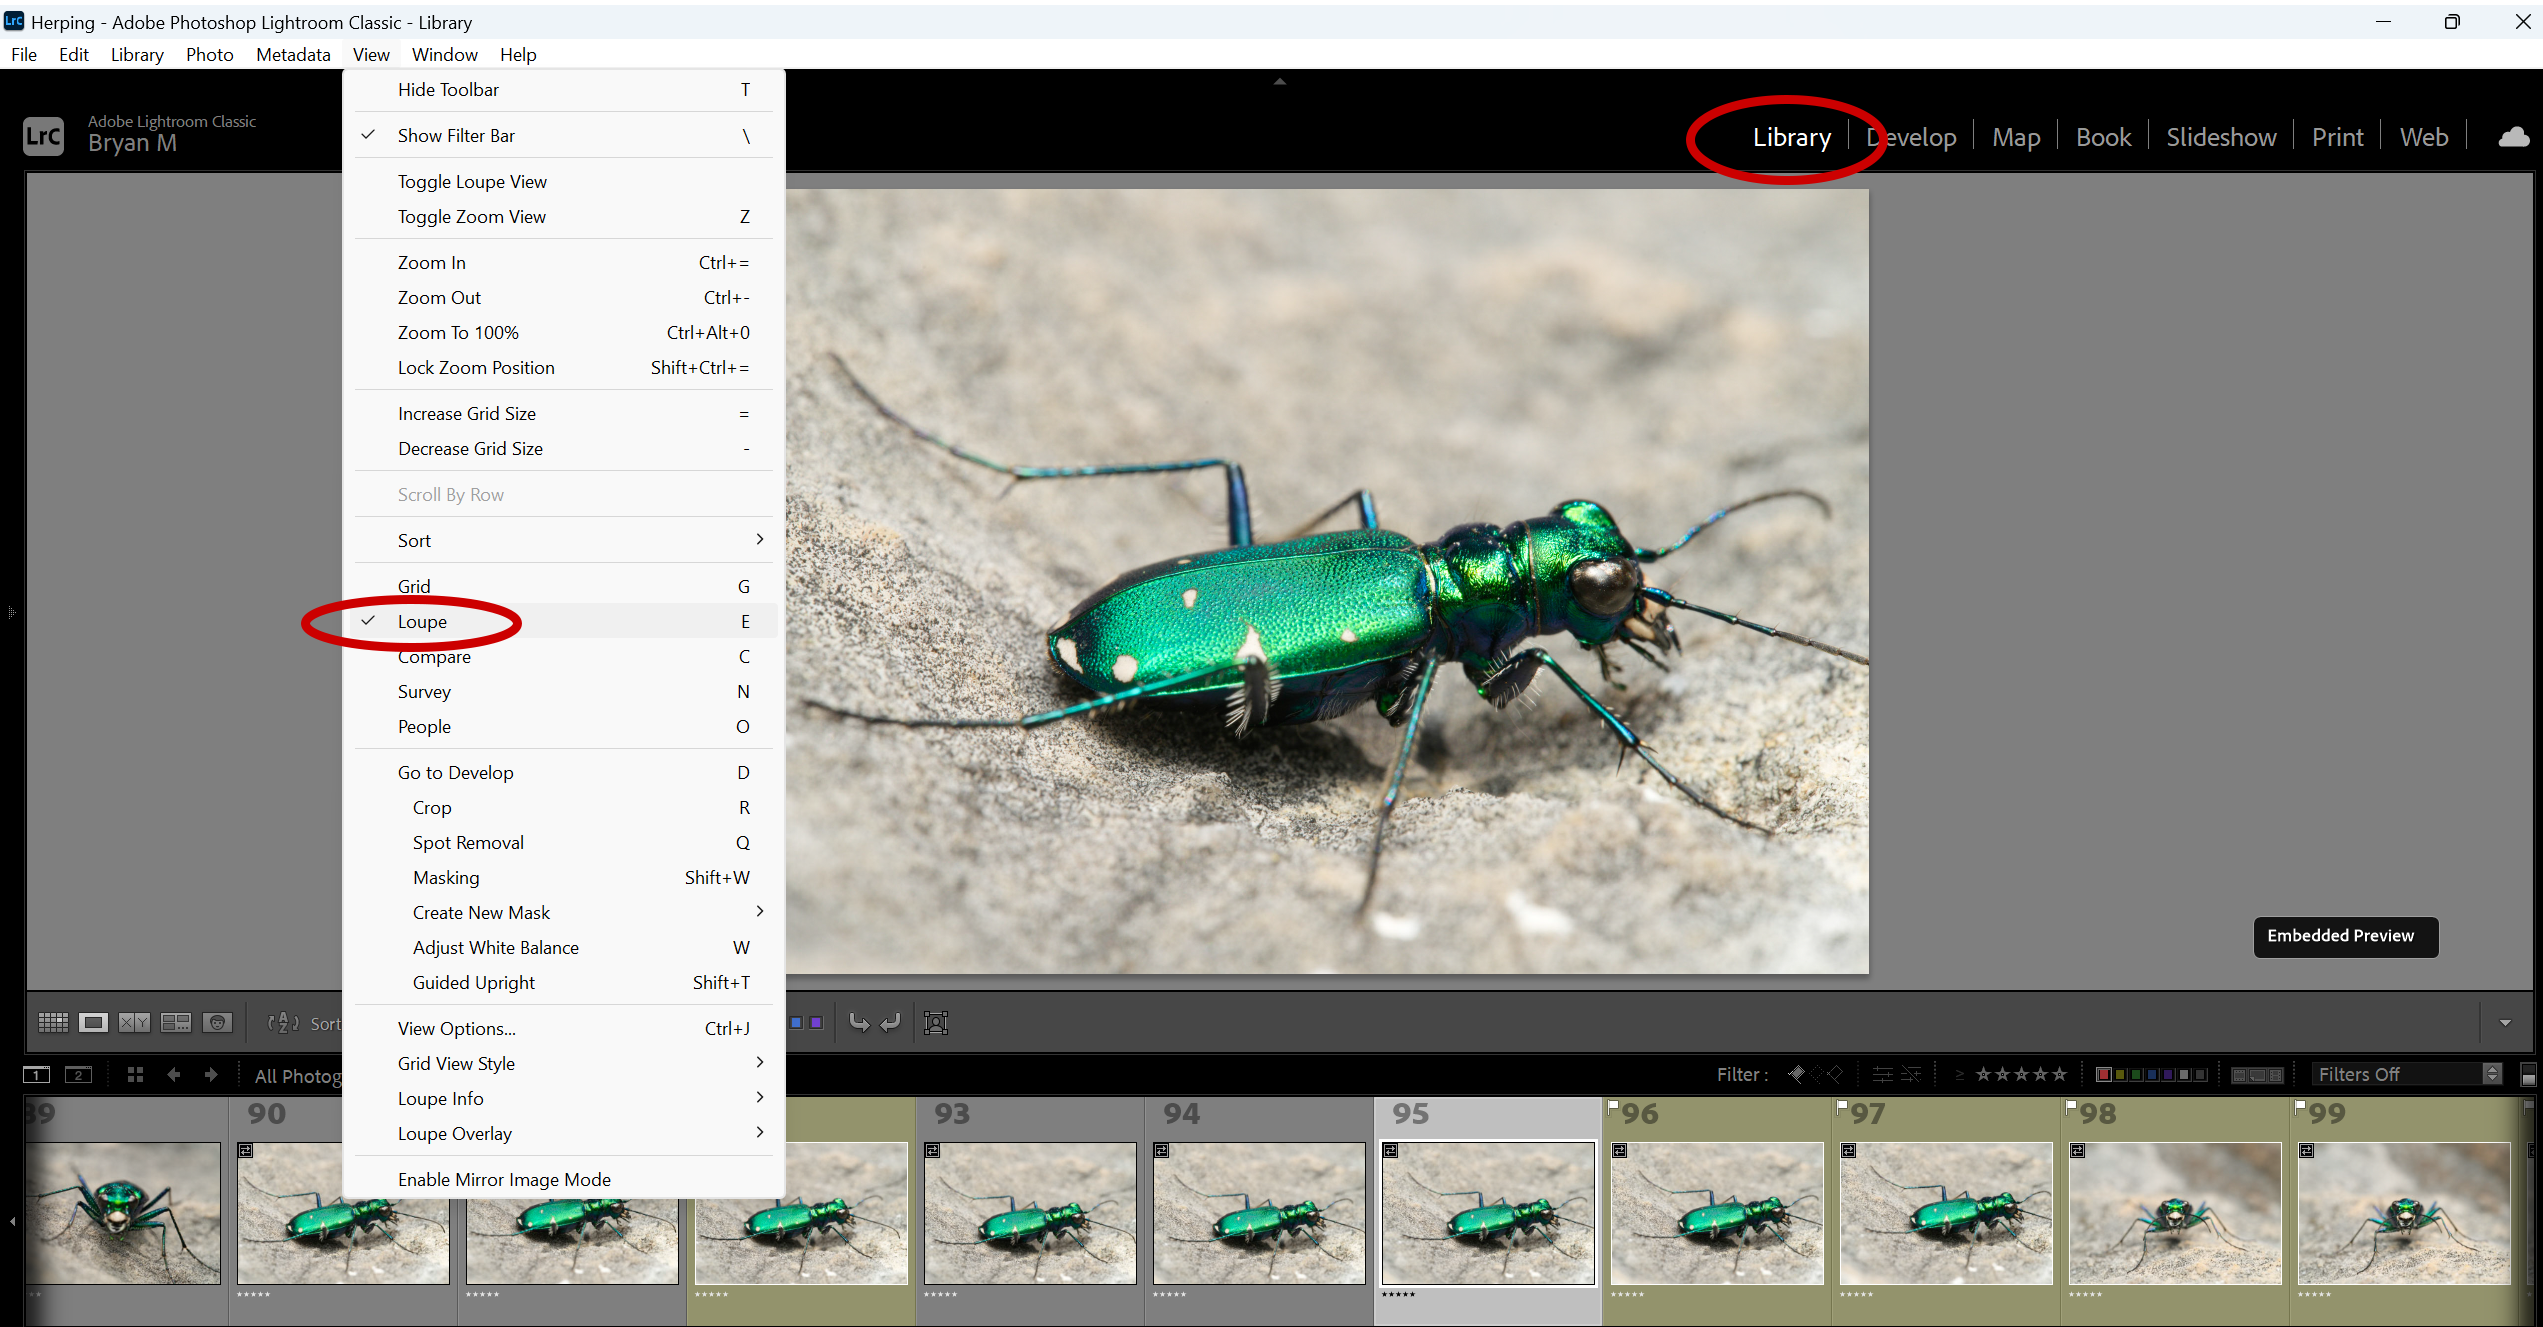
To begin culling, select the Library panel and Loupe view. Pressing Tab hides the sidebars on either side of the photo. Hit “P” to flag an image and “X” to reject it. Turn caps lock on to automatically advance to the next image. Hit “U”to undo a rating.
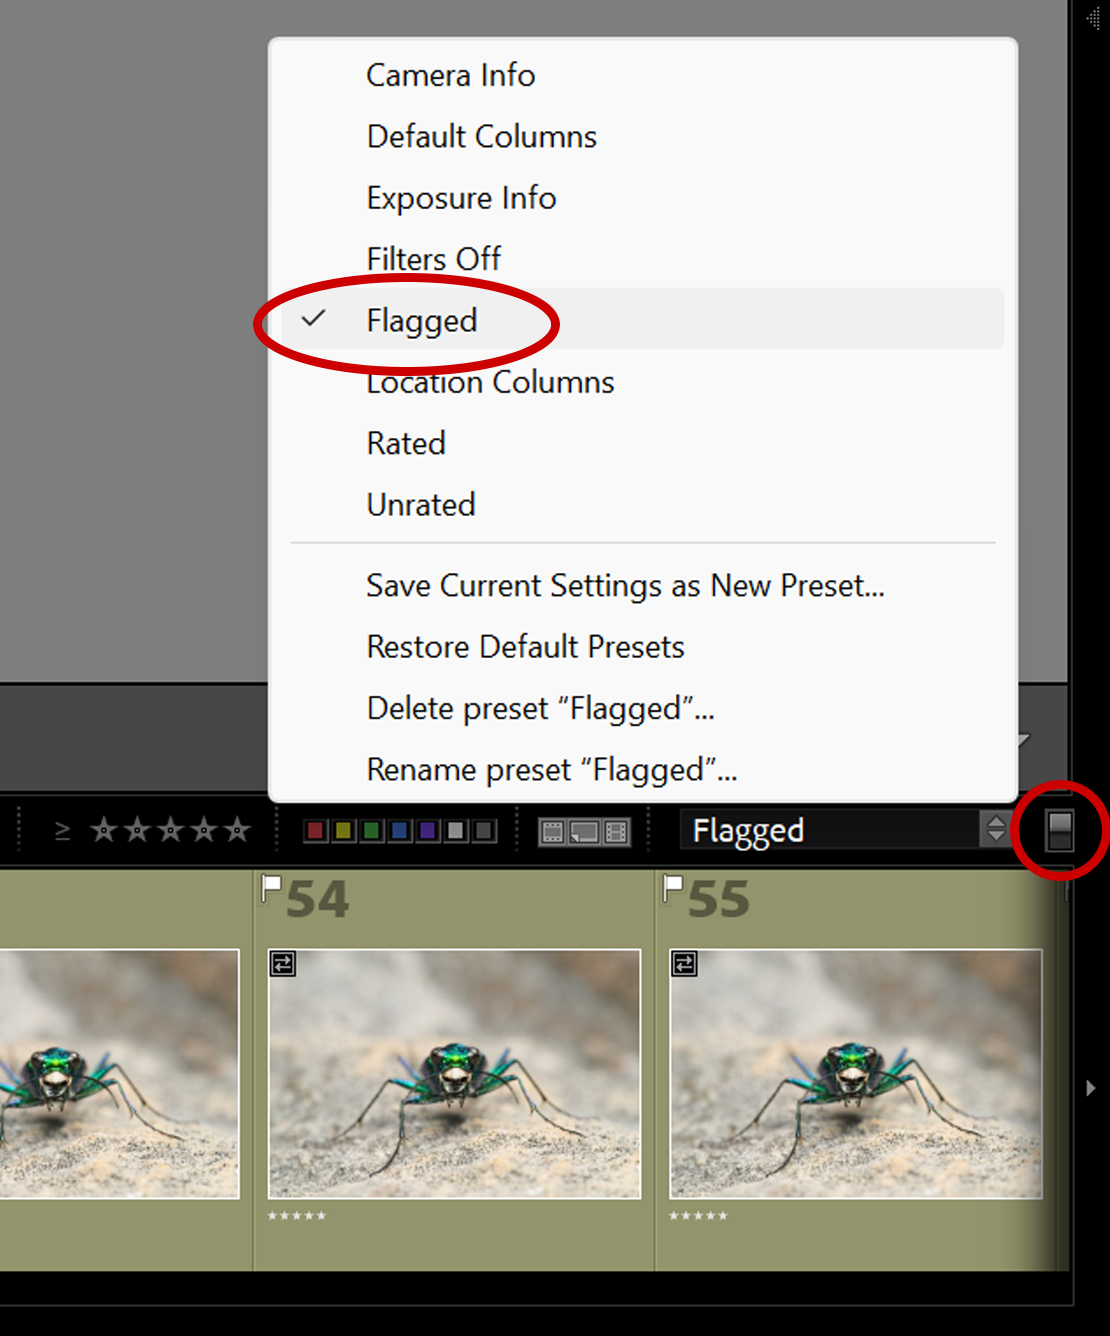 After the first cut, turn filters on and show only flagged images
Second Cut
The second cut is to mark images that you could potentially use for something. It’s also to compare shots of the same scene and flag the best ones. Begin by displaying only the flagged images from the first cut. Because this cut determines which images will live on your hard drive forever, be very critical in only selecting usable images. You might have thousands of photos, so you have to get good at quickly distinguishing keepers from rejects. If you find yourself waffling on an image, it’s probably not a keeper. Keepers should jump out at you.
I recommend using colors to flag keepers in this round. Pressing 6-9 will label photos with a different color. I use 8 for green, but you can use any of the 4 colors that you want. When you’re done culling, press the green square on the filter bar to show only images labeled green. This will show only the images that move on to the final cut.
 Use the star and color filters in the filter bar to show photos with only those attributes
Two human conditions in particular can skew your judgment when culling photos; brain fog and sentimentalism. If you start feeling fatigued, which you probably will after many images, walk away and make a sandwich. A confused brain is ineffective at culling photos. Furthermore, right after a shoot, you’re likely to be attached to your photos and resistant to culling them. It’s difficult to delete a shot if you put a lot of effort into it, even if it didn’t amount to much. Ideally, you’ll be aware of this and not succumb to keeping bad photos. Waiting a bit before culling can also help.
Final Cut
In the final cut, you’re flagging the absolute best photos. These will be your representative shots from the shoot, whether to add to your website, post online, print, send to a client or simply grow your personal portfolio. These are typically the photos that you’ll process.
I recommend using another color to flag these. I use red by pressing 6. After labeling your first photo red, in the filter bar, you need to click red on. Otherwise, the photos will disappear as you label them red. After selecting the best photos, you may need to narrow them down further. The star ratings come in handy for this. Pressing 0-5 adds a corresponding star rating to the image. I typically just use 5 stars for this phase.
Deleting the Rejected Photos
The final step is to permanently delete all of the non-usable photos. Remember, these are the photos that didn’t make it past the second cut. If you followed this process, they ended up with no color label. To show only them, click on the gray square in the color label filter to show all photos with no color label. Do a final inspection to ensure that no keepers accidentally ended up in this batch. To delete them, select all the photos by pressing CTRL + A (Command + A on Mac), then right click and select Remove Photos at the bottom of the list. Lightroom will ask you whether you want to just remove them from the Lightroom catalog, or permanently delete them from the disk.
Shop camera gear on Amazon:
 About Bryan Maltais- Fort Collins, CO
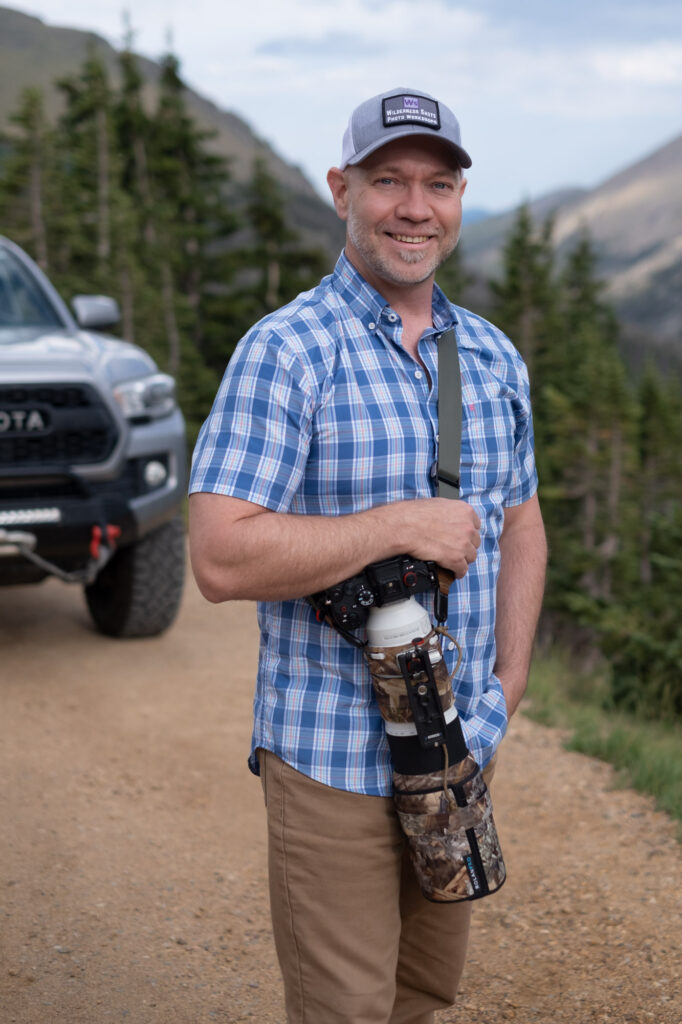 About Bryan Maltais- Fort Collins, CO
Bryan Maltais is an award-winning professional photographer, film-maker and founder of Wilderness Shots Photography Workshops. His images are displayed in spaces around the world and have been published in well known photography magazines and media channels. He’s also the author of “Infinite Horizons-The Complete Nature & Landscape Photography Guide“.
“I was addicted to exploring nature and observing animals very young, keeping terrariums full of insects and amphibians. Craving a camera to capture the beauty that I witnessed in nature, my dad gave me a manual Canon that he had lying around from 1970. A military brat, I grew up in Germany, New Jersey and Missouri. I received my BS in Wildlife Biology at the University of Missouri-Columbia. This gave me a good foundation for understanding the natural world. I also did a stint in the Army, which gave me a good foundation for tolerating insects and lack of sleep. My dream was to live in the Rocky Mountains, so after college I moved to Ft. Collins, Colorado where I still live today. Since then I’ve been shooting and documenting the American West and producing wildlife nature documentaries. My latest film is on Amazon Prime. My goal with nature photography workshops is to share knowledge, fun and adventure with others while enjoying nature. I currently shoot Sony and Olympus gear. When not photographing, I garden in my raised beds and teach 3-4 year olds in Sunday School.”
